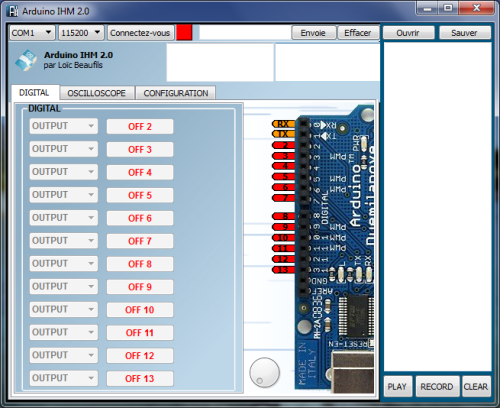
How do you intend to interact with real world using modern interfaces such as Arduino ? Coding autonomous softwares is not so easy for quick & efficient creations. Our solution is using a remote GUI with direct control over the inputs and outputs of any Arduino board. As you will see in the next part of this project, removing the link is OK so you can get an autonomous way of complex behaviors without writing a line of C code.
The project is named "Arduino IHM 2.0" from the French acronym for GUI : Interface Homme Machine.
Explanation

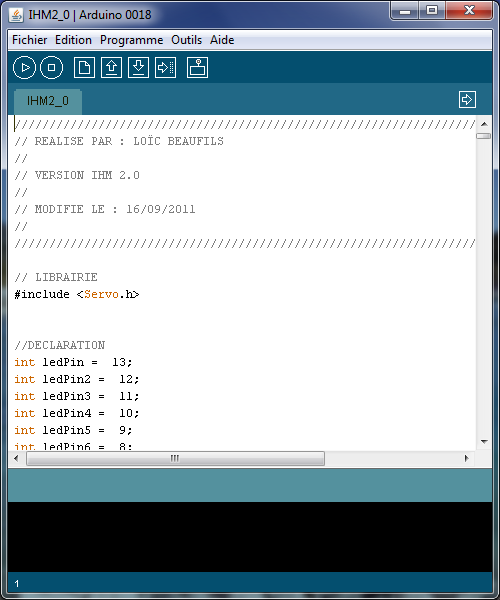
The solution is an Arduino sketch called IHM2_0 that implements a communication protocol between your computer and the Arduino board.
In other words, it opens a serial link to transfer orders to the board and get back the acknowledge of job executed. Thus you don’t have to rewrite nor access to the board when you want to change a part of your sequence.
It’s of course very useful for tests, especially with complex mechanisms such as servomotors on robots.
How To
Step 1 : Put IHM2_0 sketch into the Arduino
Open the archive and unzip it in your sketchbook.
Select your board (tested with Duemilanove, Uno, Mega 2560 and Android Arduino ADK) and the COM / tty port. You may not change the Serial speed, it’s already put on maximum 115200 bps.

Then click the button for upload into the board.
Step 2 : Software installation
The archive below contains all you need (thus it’s a bit heavy due to Qt dll). Contact us for Mac and Unix versions.
Just unzip it anywhere you want (such as Arduino software). That’s all !
Step 3 : Running Arduino IHM 2.0

Select the com port for your Arduino (the same from the skectch upload). Don’t change the baudrate until you also did it in the Arduino code.
Start the connection if the serial port is not already open somewhere else.
The digital part of the Arduino is already available as input, digital output or servomotor output. Just click and play.
Special operations
You may use the buttons such as Play and Record to store the sequence of operations. Very helpful for robot moves.
Just replay until you are satisfied. The interface is partly in french, such as "Sauver" (save) and "Ouvrir" (open) to handle text files with your sequences.
Example
Loïc’s great Quarduino robot is solely controlled with this GUI software. By using a storage shield for Arduino (with SD card for example), the text files with the sequences will be available from the Arduino without computer connection anymore. Au-to-no-mous ;)
Enjoy the video :
Evolutions
There will be an oscilloscope for the Analog part of the boards. Soon !
 PoBot
PoBot
 Remote control GUI for Arduino


Your comments
# On 6 November 2015 at 16:59, by Dr. C.M.J. Wijers Replying to: Remote control GUI for Arduino
Dear Sirs,
I am a scientist and want to use your user interface. I use however exclusively linux.
Could you be so kind to provide me with the code for Arduino IHM 2.0. I am using Mint Linux.
If you send me the code, I can see if I can adapt it to my kind of work, but that is not robotics.
It is for measuring and control purposes.
Thank you in advance,
Best regards,
Dr. C.M.J. Wijers
Reply to this message